Migrating to ClickHouse using clickhouse-local

You can use ClickHouse, or to be more specific,clickhouse-local
as an ETL tool for migrating data from your current database system to ClickHouse Cloud, as long as for your current database system there is either a
ClickHouse-provided integration engine or table function, respectively,
or a vendor provided JDBC driver or ODBC driver available.
ClickHouse provides integration engines and table functions (that create integration engines on-the-fly) for MySQL, PostgreSQL, MongoDB and SQLite. For all other popular database systems, there is JDBC driver or ODBC driver available from the vendor of the system.
What is clickhouse-local?
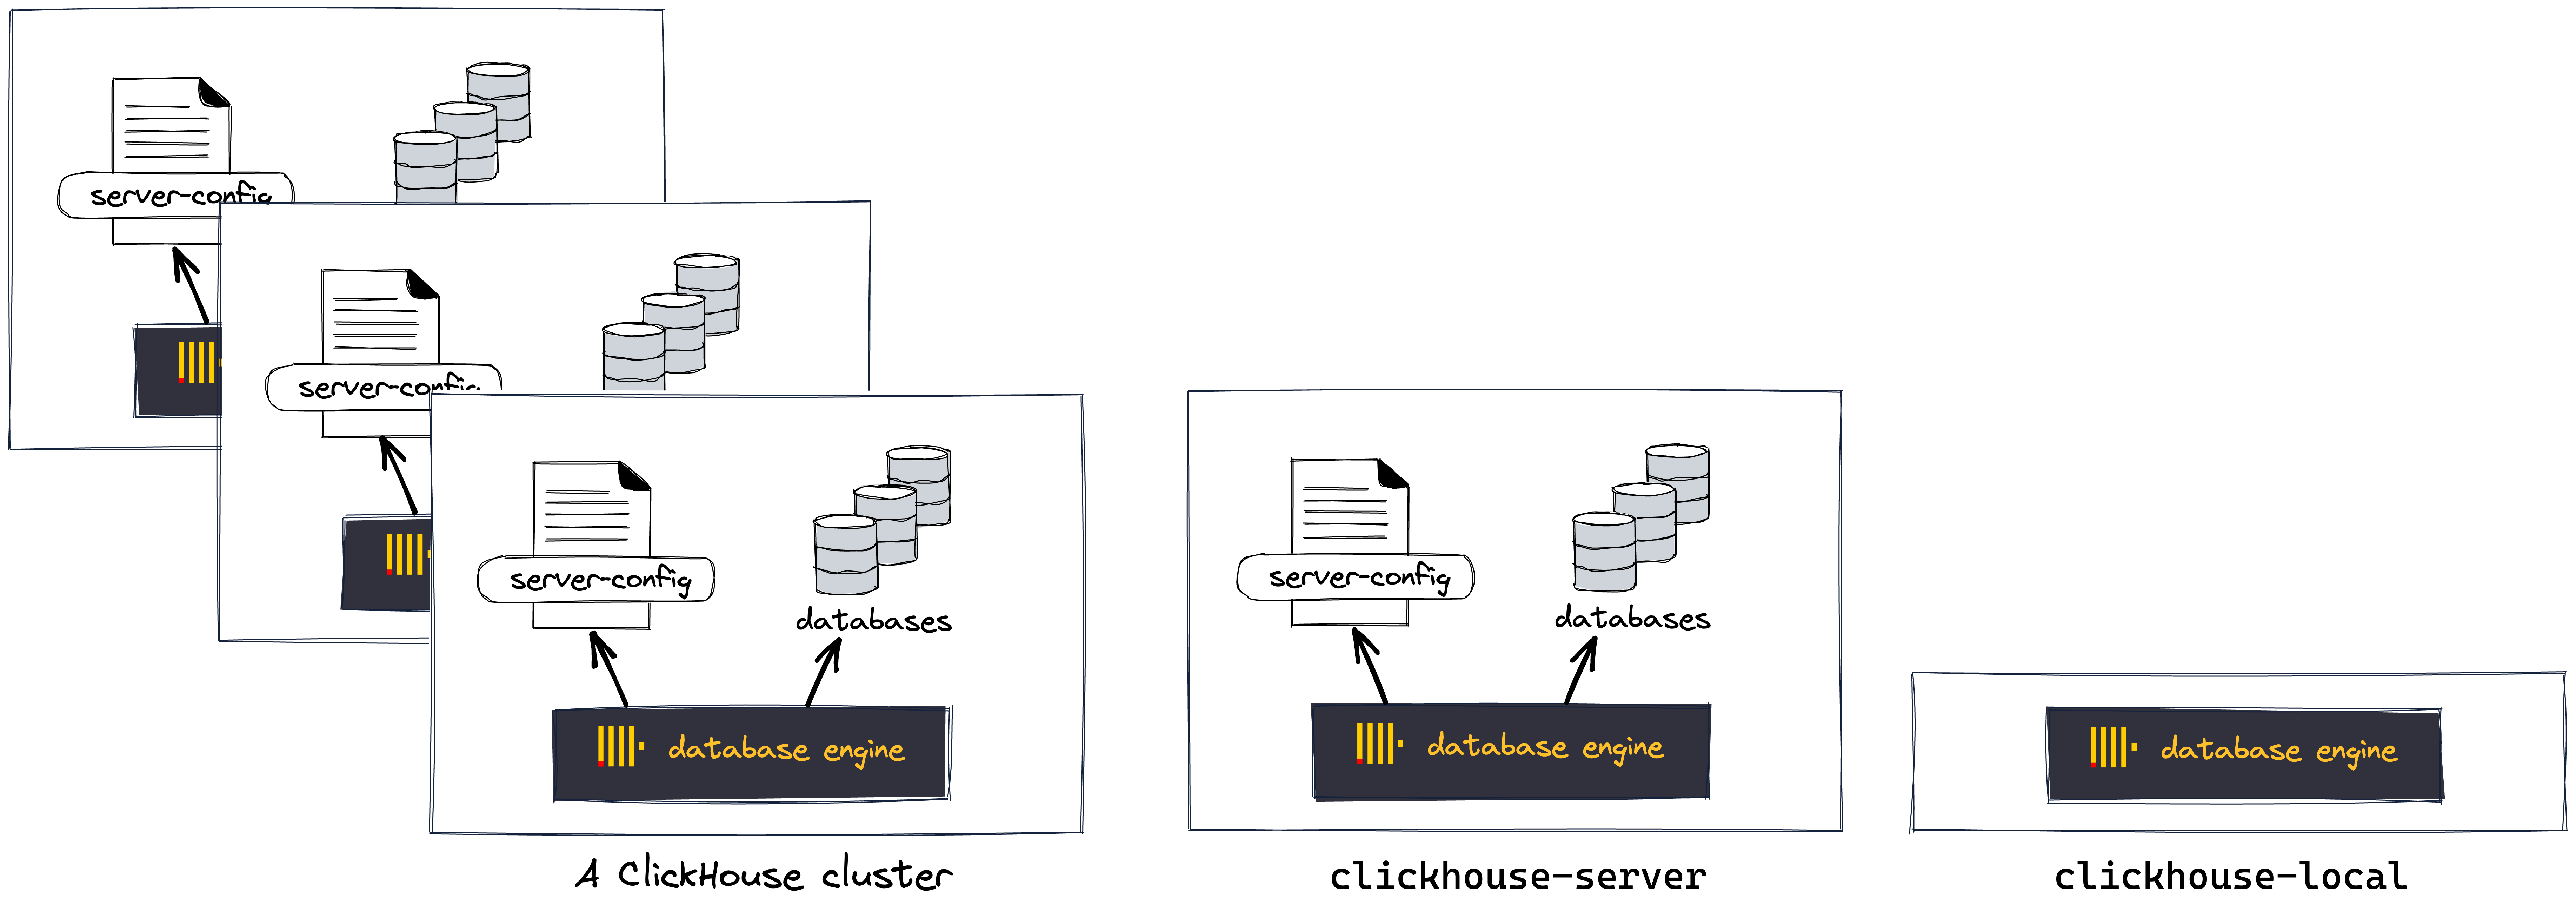
Typically, ClickHouse is run in the form of a cluster, where several instances of the ClickHouse database engine are running in a distributed fashion on different servers.
On a single server, the ClickHouse database engine is run as part of the clickhouse-server program. Database access (paths, users, security, ...) is configured with a server configuration file.
The clickhouse-local tool allows you to use the ClickHouse database engine isolated in a command-line utility fashion for blazing-fast SQL data processing on an ample amount of inputs and outputs, without having to configure and start a ClickHouse server.
Installing clickhouse-local
You need a host machine for clickhouse-local that has network access to both your current source database system and your ClickHouse Cloud target service.
On that host machine, download the appropriate build of clickhouse-local based on your computer's operating system:
- Linux
- macOS
The simplest way to download
clickhouse-locallocally is to run the following command:curl https://clickhouse.com/ | shRun
clickhouse-local(it will just print its version):./clickhouse-local
The simplest way to download
clickhouse-locallocally is to run the following command:curl https://clickhouse.com/ | shRun
clickhouse-local(it will just print its version):./clickhouse local
The examples throughout this guide use the Linux commands for running clickhouse-local (./clickhouse-local).
To run clickhouse-local on a Mac, use ./clickhouse local.
In order for the remoteSecure function to connect to your ClickHouse Cloud service, the IP address of the remote system needs to be allowed by the IP Access List. Expand Manage your IP Access List below this tip for more information.
Manage your IP Access List
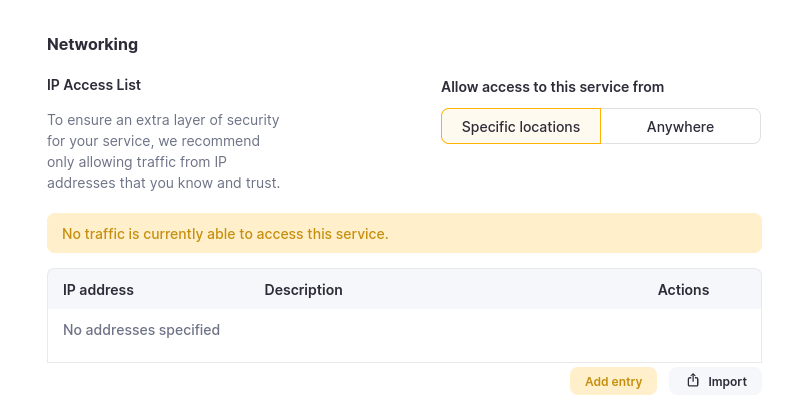
From your ClickHouse Cloud services list choose the service that you will work with and switch to Security. If the IP Access List does not contain the IP Address or range of the remote system that needs to connect to your ClickHouse Cloud service, then you can resolve the problem with Add entry:
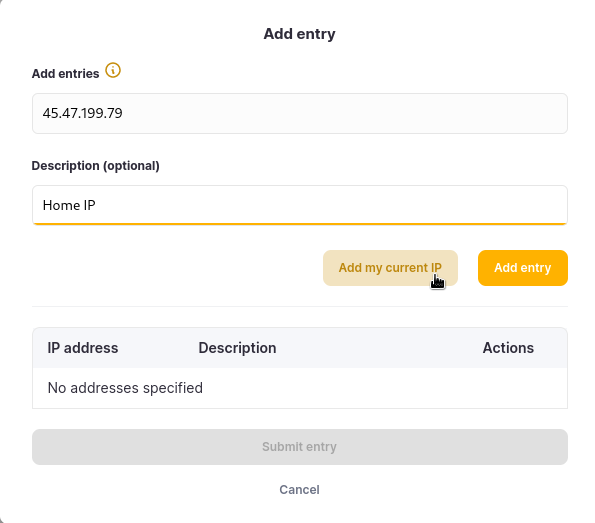
Add the individual IP Address, or the range of addresses that need to connect to your ClickHouse Cloud service. Modify the form as you see fit and then Add entry and Submit entry.
Example 1: Migrating from MySQL to ClickHouse Cloud with an Integration engine
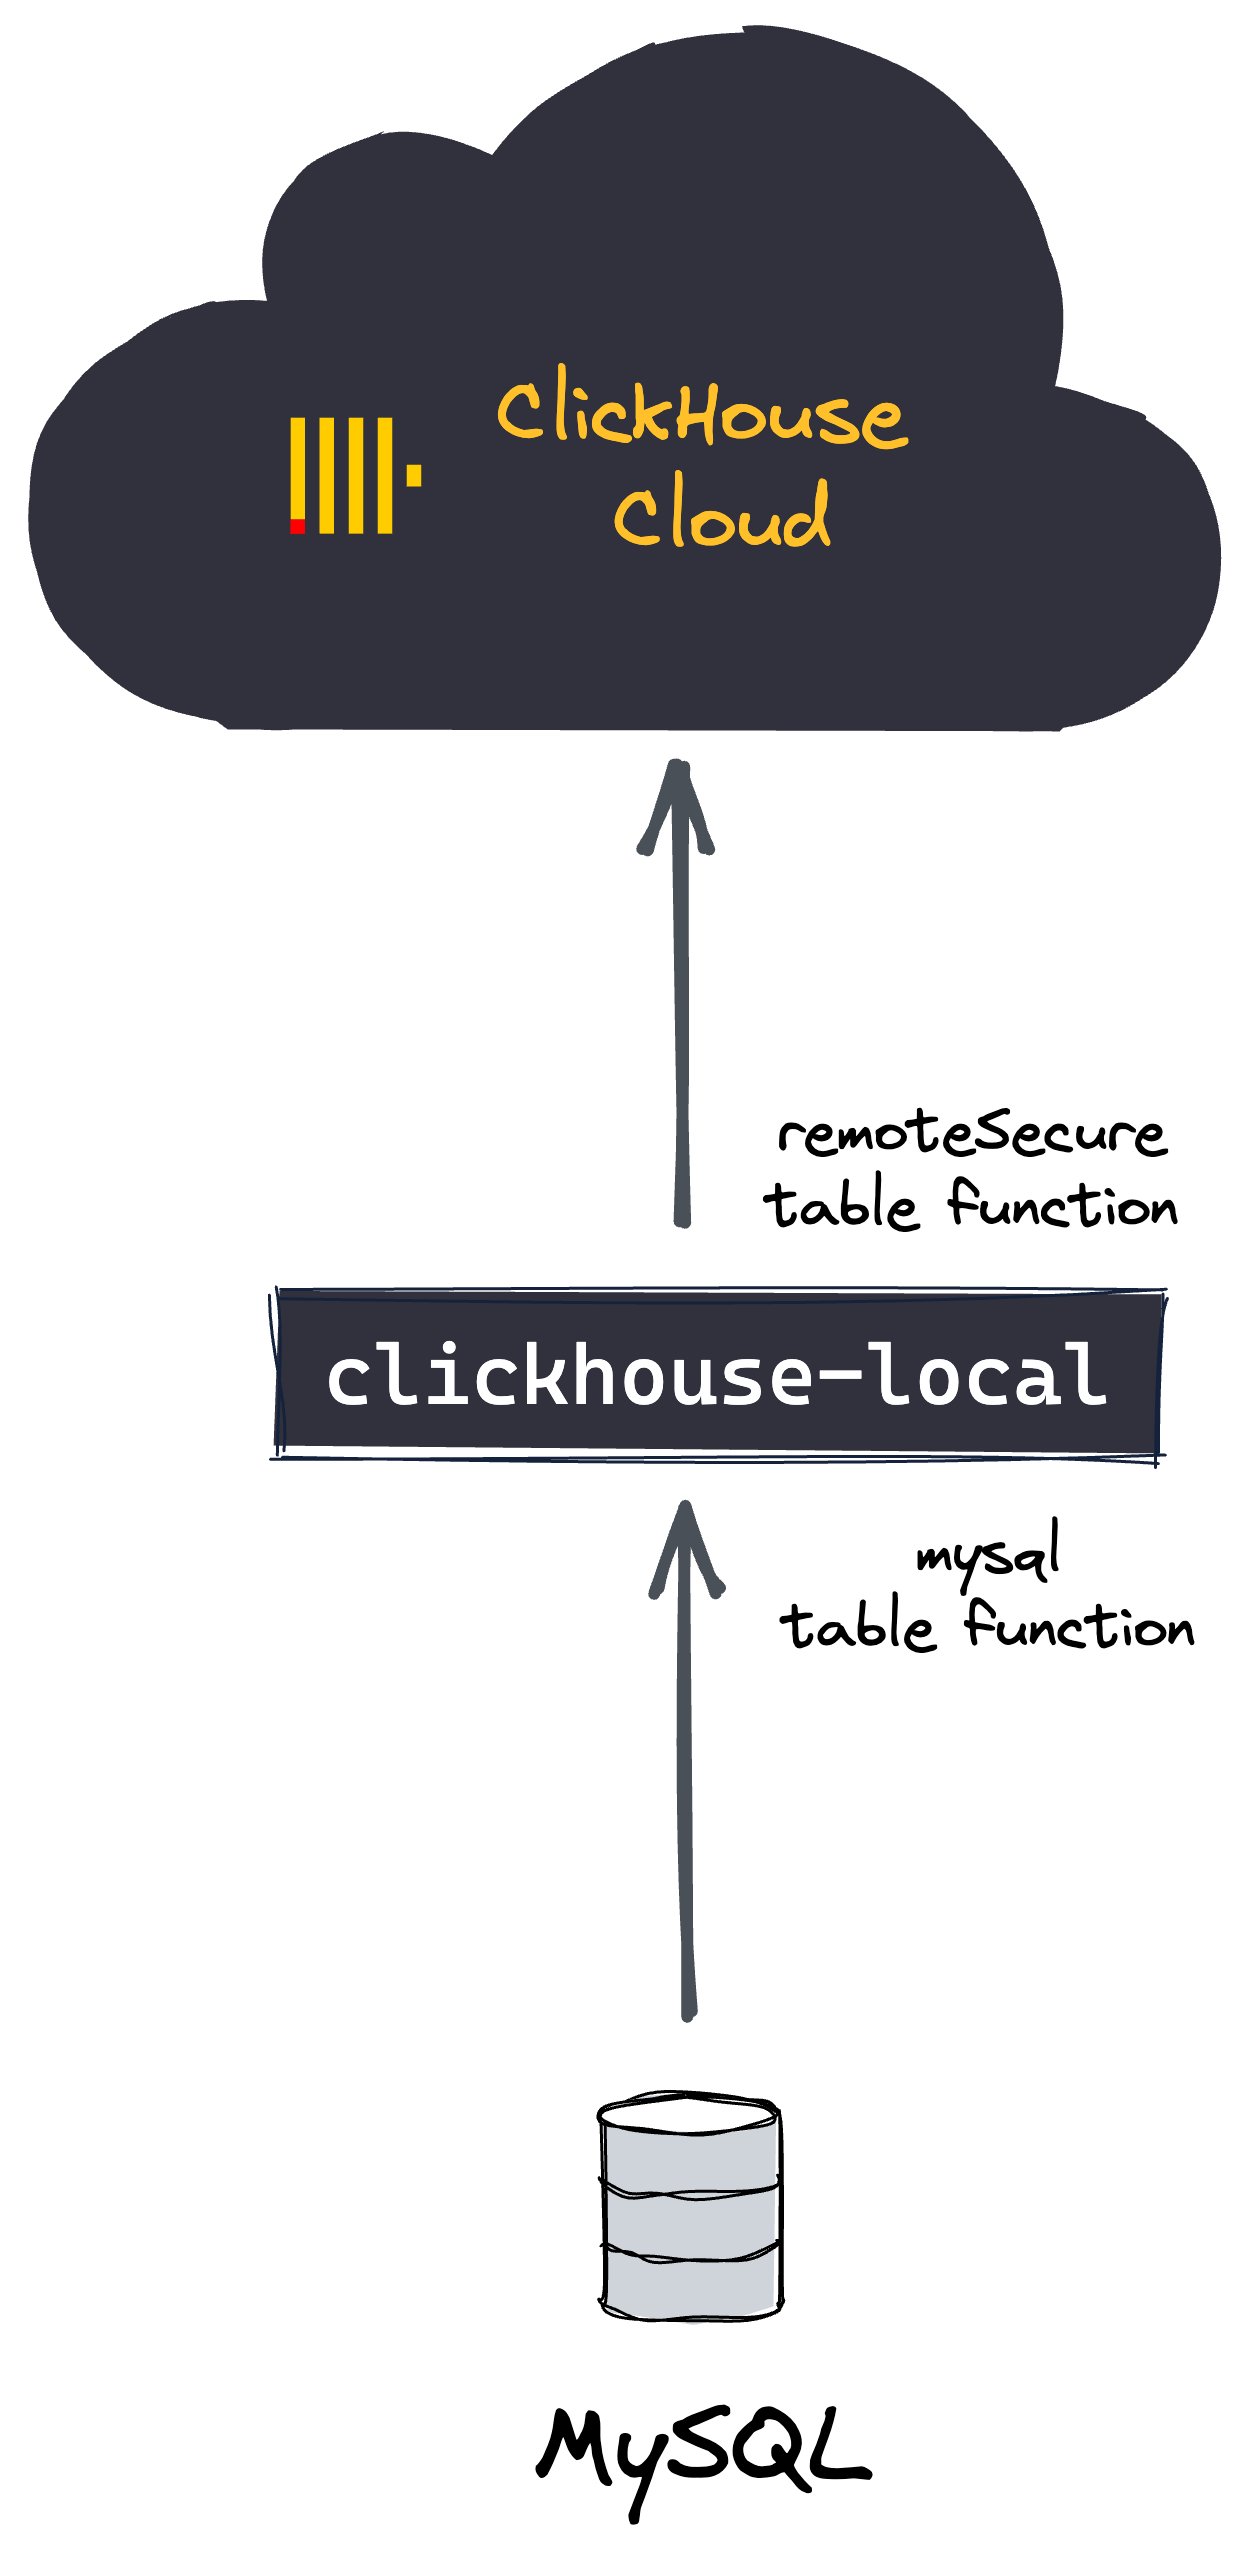
We will use the integration table engine (created on-the-fly by the mysql table function) for reading data from the source MySQL database and we will use the remoteSecure table function for writing the data into a destination table on your ClickHouse cloud service.
On the destination ClickHouse Cloud service:
Create the destination database:
CREATE DATABASE db
Create a destination table that has a schema equivalent to the MySQL table:
CREATE TABLE db.table ...
The schema of the ClickHouse Cloud destination table and schema of the source MySQL table must be aligned (the column names and order must be the same, and the column data types must be compatible).
On the clickhouse-local host machine:
Run clickhouse-local with the migration query:
./clickhouse-local --query "
INSERT INTO FUNCTION
remoteSecure('HOSTNAME.clickhouse.cloud:9440', 'db.table', 'default', 'PASS')
SELECT * FROM mysql('host:port', 'database', 'table', 'user', 'password');"
No data is stored locally on the clickhouse-local host machine. Instead, the data is read from the source MySQL table
and then immediately written to the destination table on the ClickHouse Cloud service.
Example 2: Migrating from MySQL to ClickHouse Cloud with the JDBC bridge
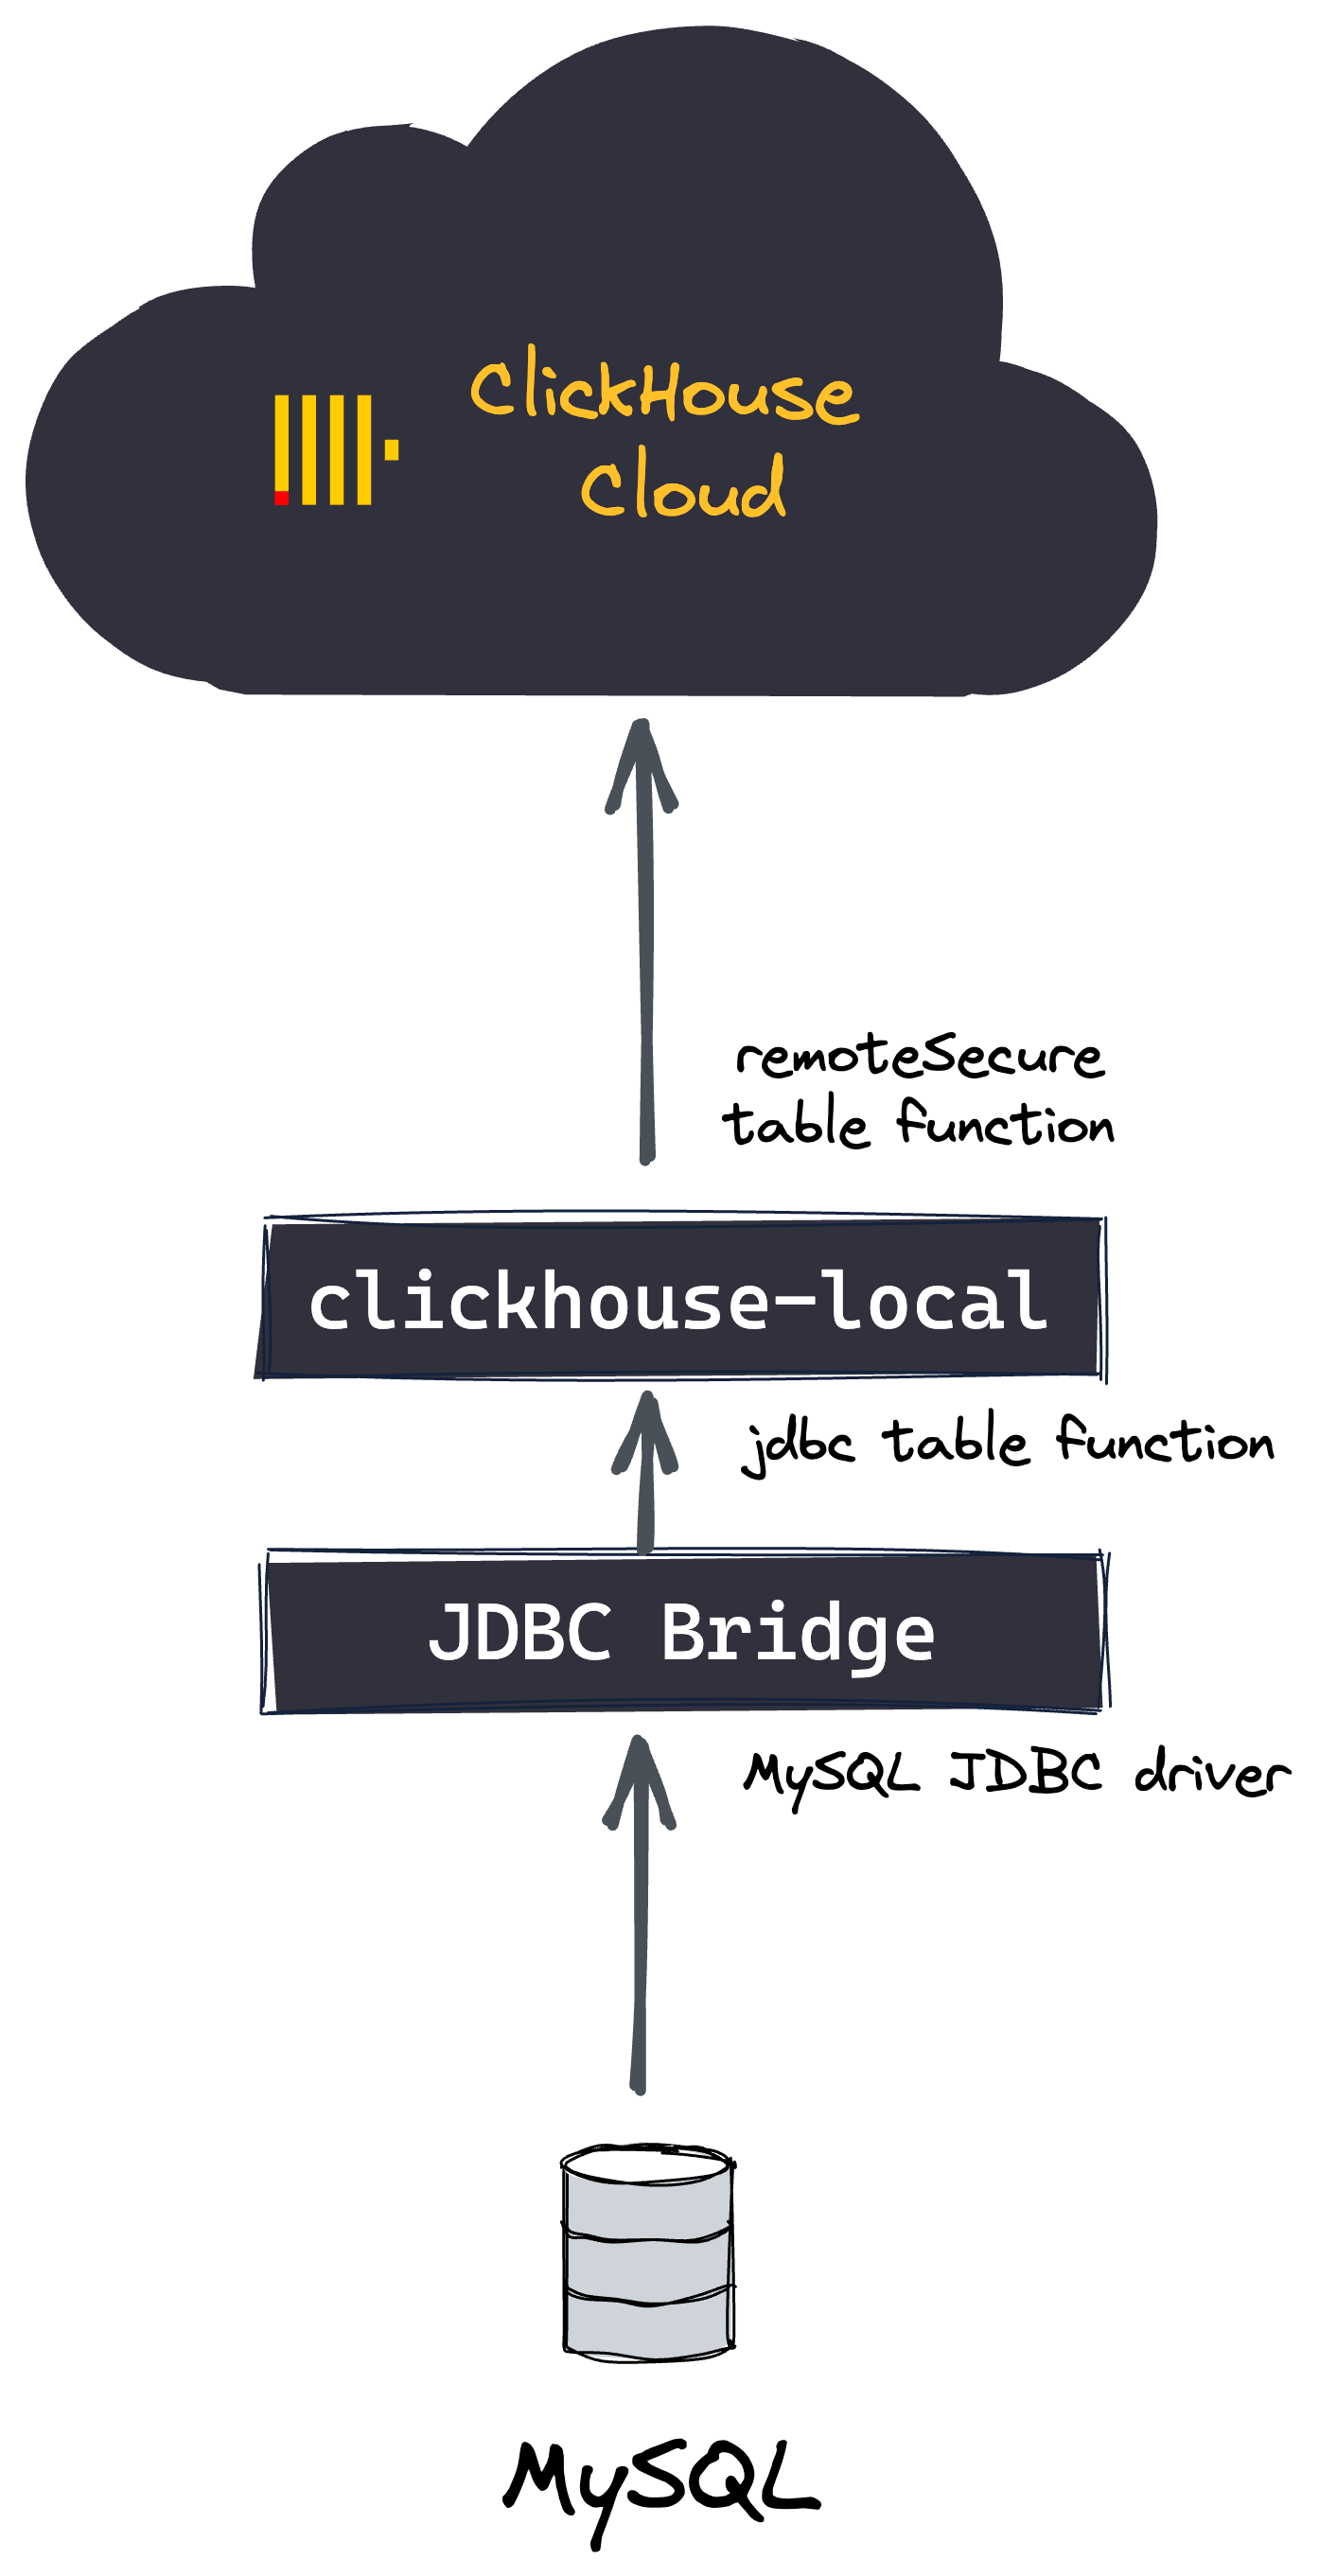
We will use the JDBC integration table engine (created on-the-fly by the jdbc table function) together with the ClickHouse JDBC Bridge and the MySQL JDBC driver for reading data from the source MySQL database and we will use the remoteSecure table function for writing the data into a destination table on your ClickHouse cloud service.
On the destination ClickHouse Cloud service:
Create the destination database:
CREATE DATABASE db
Create a destination table that has a schema equivalent to the MySQL table:
CREATE TABLE db.table ...
The schema of the ClickHouse Cloud destination table and schema of the source MySQL table must be aligned, e.g. the column names and order must be the same, and the column data types must be compatible.
On the clickhouse-local host machine:
Install, configure, and start the ClickHouse JDBC Bridge locally:
Follow the steps from the guide. The guide also contains steps for configuring a data source from MySQL.
Run clickhouse-local with the migration query:
./clickhouse-local --query "
INSERT INTO FUNCTION
remoteSecure('HOSTNAME.clickhouse.cloud:9440', 'db.table', 'default', 'PASS')
SELECT * FROM jdbc('datasource', 'database', 'table');"
No data is stored locally on the clickhouse-local host machine. Instead, the data is read from the MySQL source table
and then immediately written to the destination table on the ClickHouse Cloud service.